Create or Edit a Case
Use this form to create a new case for a customer, or to update an existing case.
To open it:
- New case: on the Case List, click Create Case. Or, on the Customer List, click Create Case on the customer's row. The customer is then already filled in.
- Edit a case: open the case and click Edit Case. See Case Details.
Permissions
Set in Role & Permission:
| Item | Permission |
|---|---|
| Create Case (Submit) | Cases > Create |
| Edit Case (Update) | Cases > Edit |
| Customer Name list | Customers > View (Customers > View all to list customers that aren't yours) |
| Sales Admin, Deal Maker and IMS Processing lists | Users > View |
| COP list | COP > View |
Without Users > View, the handler lists are empty and the case can't be saved.
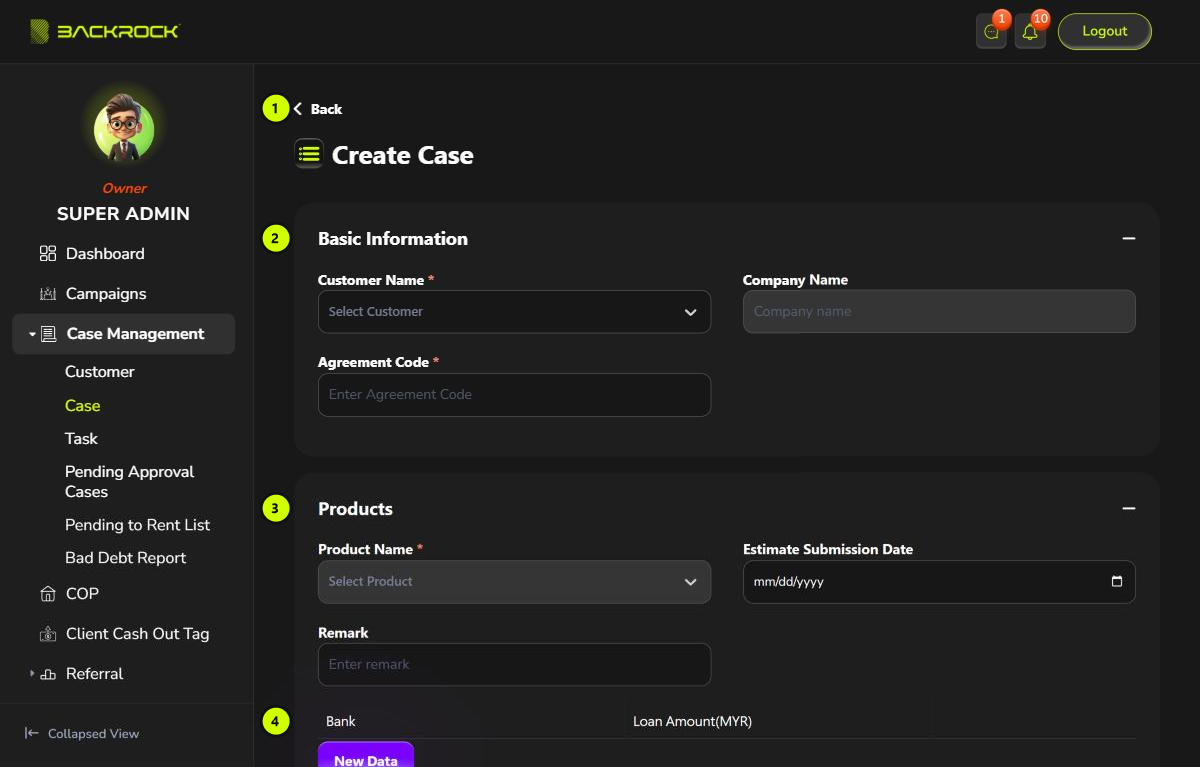
1. Back
New case: returns to the Case List. Edit: returns to the page you opened the form from, usually Case Details.
2. Basic Information
- Customer Name (required): choose the customer. Only customers who have registered in the Member Portal are listed. If your role can't view all customers, only your own customers are listed.
- Company Name: filled in from the customer.
- Agreement Code (required): must not already be used by another customer's case. Otherwise you see Agreement code is already used by another customer.
3. Products
- Product Name (required): choose a customer first. The list only shows products the customer can take. A product the customer already has in a case that is still in progress is not listed, and some products can't be combined with others.
- COP: only for a COP product. Choose the COP property (optional).
- Commission Type and the rate: shown from the product. You can't change them.
- Charging Fee: only for products that charge a fee (the label may use the product's own name for the fee). It is required. For a margin commission, it can't be smaller than the base rate.
- Estimate Submission Date and Remark: optional.
4. Banks
Add the banks the case will be submitted to.
- Click New Data to add a row.
- Choose the Bank and type the Loan Amount(MYR).
- Click the bin icon to remove a row.
At least one bank is required. Otherwise you see At least one bank is required. Each bank can only be chosen once: a bank already chosen in another row is not in the list.
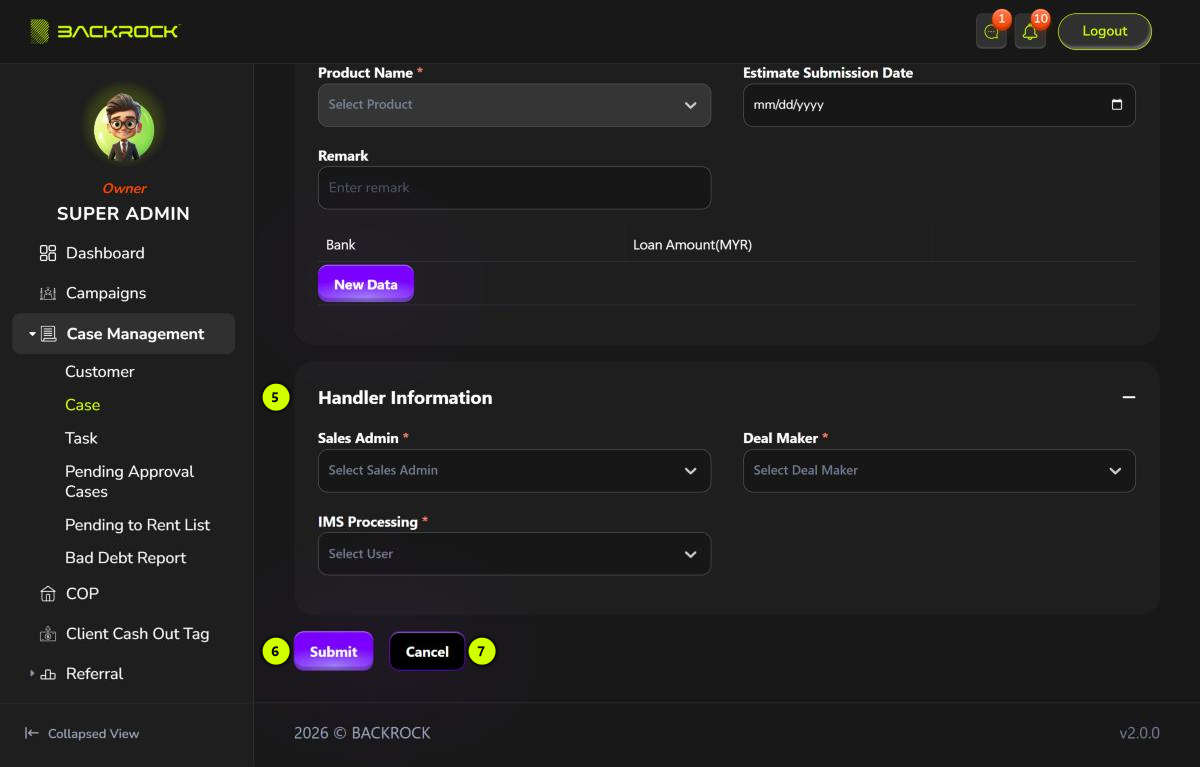
5. Handler Information
- Agent: if the customer belongs to an agent, the agent is shown here. You can't change it.
- Sales Admin (required): only if the customer belongs to the company. Choose who handles the case.
- Deal Maker (required): choose the deal maker.
- IMS Processing (required): choose the processing person.
6. Submit / Update
- New case: click Submit. You see Case created successfully and return to the Case List. The case starts at the first status of the product's workflow.
- Edit: click Update. You see Case updated successfully and return to Case Details.
If a required field is empty, it shows This field is required.
7. Cancel
Leaves without saving. Like Back, it returns to the Case List for a new case, or to Case Details for an edit.
Edit a case
When you edit a case:
- You can't change the Customer or the Product.
- You can change the agreement code, handlers, charging fee, date, remark and banks. For a COP case, you can also change the COP.
- Banks that are already in the case keep their status and Final Approved Amount. A bank you add starts as Pending. A bank you remove with the bin icon is taken off the case.