Customer List
The Customer List shows your customers. From here you can add a customer, open their details, or start a case for them.
To open it: in the left menu, click Case Management > Customer.
You see the customers that belong to you. If your role can view all customers, you see every customer.
Permissions
Set in Role & Permission:
| Item | Permission |
|---|---|
| Customer menu and list | Customers > View |
| See every customer, not only yours | Customers > View all |
| Create Customer | Customers > Create |
| View | Customers > View |
| Edit, Disable / Enable | Customers > Edit |
| Create Case | Cases > Create |
| Settlement | Settlements > View |
| Special Commission | Special Commissions > View |
| Payment | Payments > View |
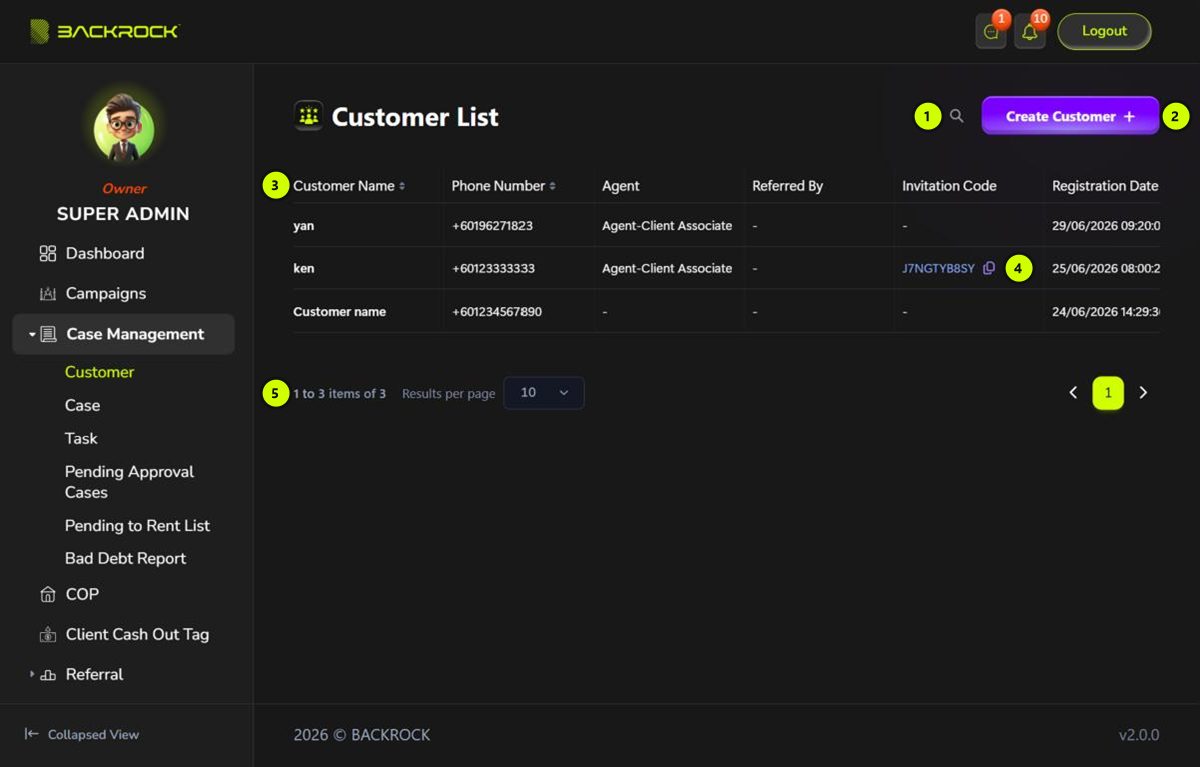
1. Search
Click the search icon (🔍), then type a customer's name or phone number. The list updates as you type. You can type the phone number with or without the country code.
2. Create Customer
Opens the form to add a new customer. See Create or Edit a Customer.
You only see this button if your role can create customers.
3. Customer table
The newest customers are shown first. Click Customer Name, Phone Number or Registration Date to sort.
| Column | What it shows |
|---|---|
| Customer Name | The customer's name |
| Phone Number | Country code and phone number, for example +60123456789 |
| Agent | The agent the customer belongs to. - means the customer belongs to the company |
| Referred By | Who referred the customer, or - if nobody did |
| Invitation Code | The customer's invitation code, until the customer registers. See part 4 |
| Registration Date | When the customer was added to the system (not when they registered in the Member Portal) |
4. Invitation Code
A new customer gets an invitation code. The customer uses it to register in the Member Portal.
- Click the code to open the Member Portal registration page with the code filled in.
- Click the copy icon next to the code to copy the registration link. You see Copied. Send this link to the customer.
- Once the customer has registered, the column shows -.
5. Pages
If you have many customers, use the arrows or page numbers on the right to move between pages. Use Results per page on the left to show 10, 25, 50 or 100 customers per page.
Status and actions
The table is wider than the page. Scroll it to the right to see Status and Action.
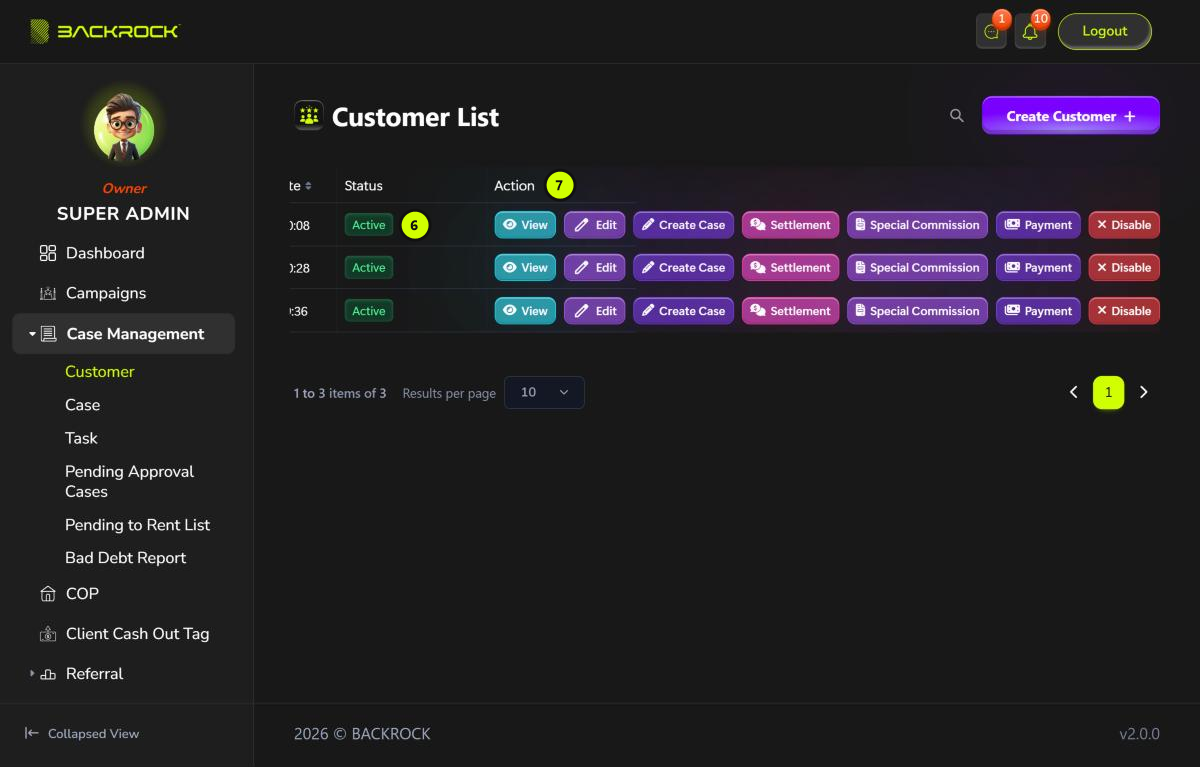
6. Status
Active or Inactive. An inactive customer can't sign in to the Member Portal.
7. Action
Each button only appears if your role allows it.
| Button | What it does |
|---|---|
| View | Opens the customer's details (read only). See Create or Edit a Customer |
| Edit | Opens the customer's details to change them. See Create or Edit a Customer |
| Create Case | Starts a new case for this customer. Only shown once the customer has registered (used their invitation code). See Create or Edit a Case |
| Settlement | Opens the Settlement page (Finance menu), showing only this customer |
| Special Commission | Opens the Special Commission page (Finance menu), showing only this customer |
| Payment | Opens the Payment page (Finance menu), showing only this customer |
| Disable / Enable | Makes the customer inactive or active again. Click it, then click Yes to confirm. You see Customer status updated successfully |