Settlement
Use Settlement to keep a customer's funding record: what was funded, the profit terms, the money paid out (disbursements) and the money collected back (repayments).
To open it: in the left menu, click Finance > Settlement.
You can also open it from the Customer List: click Settlement on a customer's row to see only that customer's settlements. Click Clear filter to see all settlements again.
Permissions
Set in Role & Permission:
| Item | Permission |
|---|---|
| Settlement menu and list | Settlements > View |
| Create Settlement | Settlements > Create |
| Edit (Update) | Settlements > Edit |
| View (read-only Settlement Details) | Settlements > View |
| Customer list in the form | Customers > View (Customers > View all to list customers that aren't yours) |
Settlement List
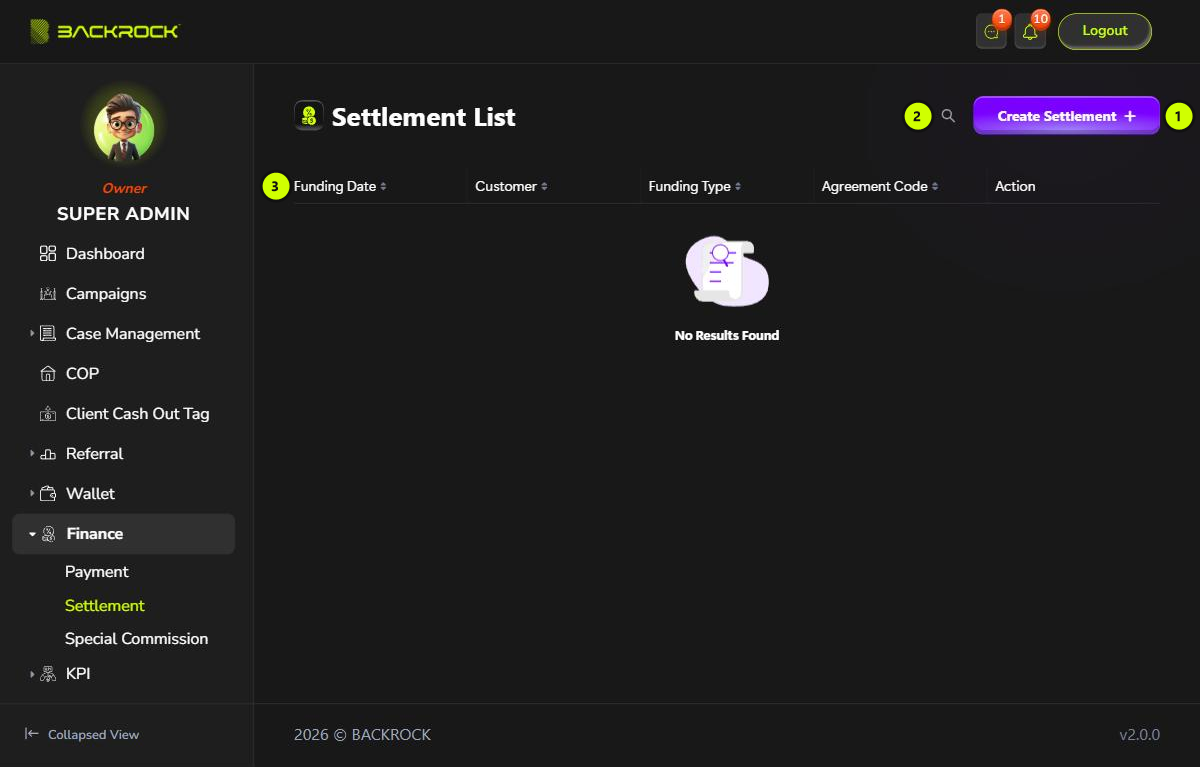
1. Create Settlement
Opens the form to add a settlement. See Create a settlement. You only see this button if your role can create settlements.
2. Search
Click the search icon (🔍), then type an agreement code, a funding type, or a customer's name or phone number. The list updates as you type.
3. Settlement table
The newest settlements are shown first. Click a column title to sort by that column.
| Column | What it shows |
|---|---|
| Funding Date | The funding date |
| Customer | The customer, with their phone number |
| Funding Type | The type of funding, for example EPF Contribution |
| Agreement Code | The agreement code |
| Action | Edit, if your role can edit settlements. See Edit a settlement. If your role can only view settlements, View opens the same page read-only (Settlement Details); you can still open the attachments |
If there are no settlements, you see No Results Found.
Create a settlement
The form is long. Its parts are shown in three pictures below.
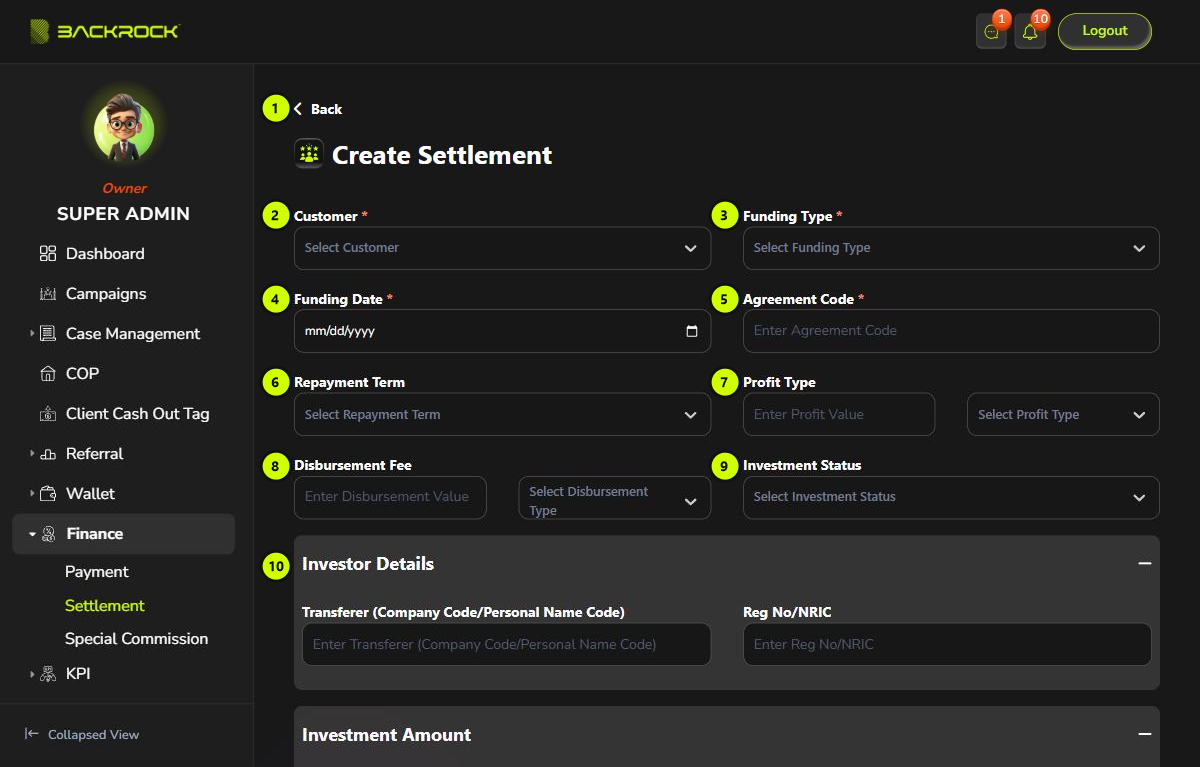
- Back: returns to the Settlement List.
- Customer (required): choose the customer. You can type to search. Only customers who have registered in the Member Portal are listed. If your role can't view all customers, only your own customers are listed.
- Funding Type (required): for example IMS-BS4M (Salary), EPF Contribution, Credit Card Settlement or Advance Payment.
- Funding Date (required).
- Agreement Code (required).
- Repayment Term: Pay and Use Basis or Upon Disbursement (By Result).
- Profit Type: type the value, then choose % or MYR.
- Disbursement Fee: type the value, then choose % or MYR.
- Investment Status: for example Active, Partial Collected or Case Default.
- Investor Details: the Transferer (Company Code/Personal Name Code) and Reg No/NRIC.
If you type a Profit Type or Disbursement Fee value, also choose % or MYR for it. Otherwise you see This field is required. If you leave the value empty, you don't need to choose.
Click − on a section to hide it, and + to show it again.
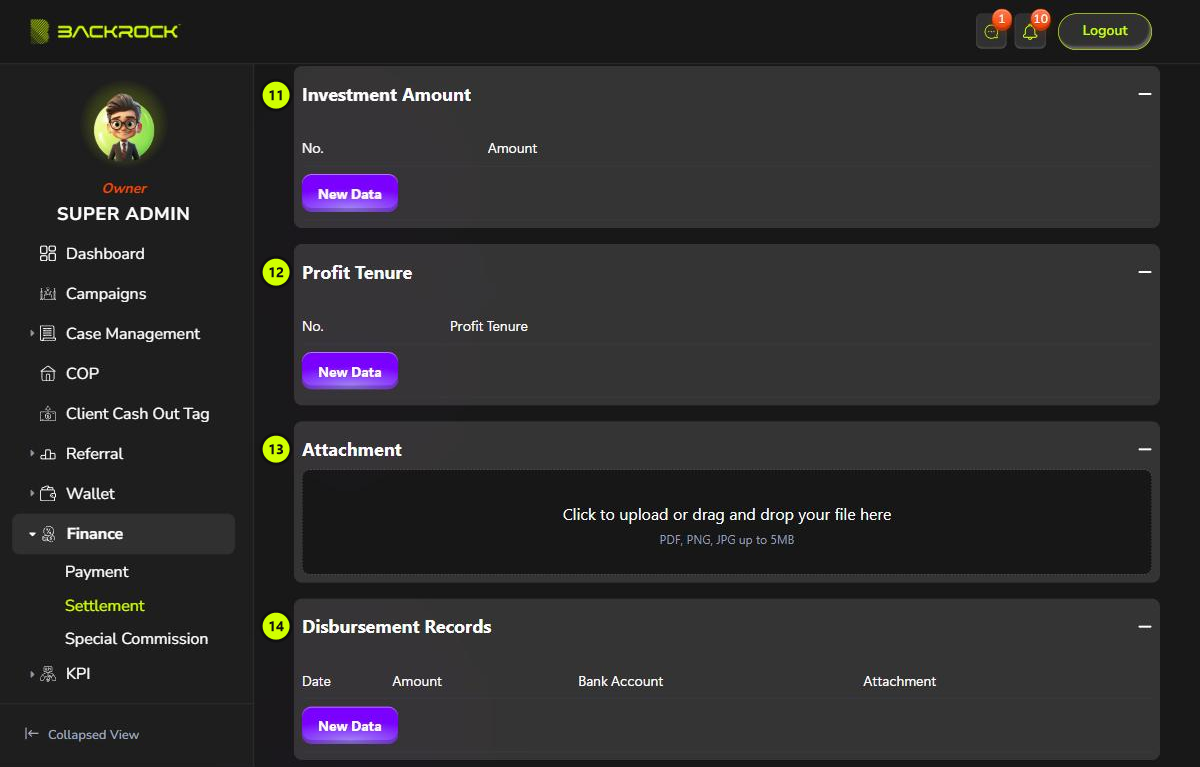
- Investment Amount: click New Data to add an amount. Add a row for each amount. Click the bin icon to remove a row.
- Profit Tenure: click New Data, then choose the tenure, for example Monthly or Quarterly.
- Attachment: click the upload area and choose the documents. You can add more than one PDF, PNG or JPG file.
- Disbursement Records: the money paid out. Click New Data, then fill in the Date, Amount and Bank Account. Click Select attachment to add a file to the row.
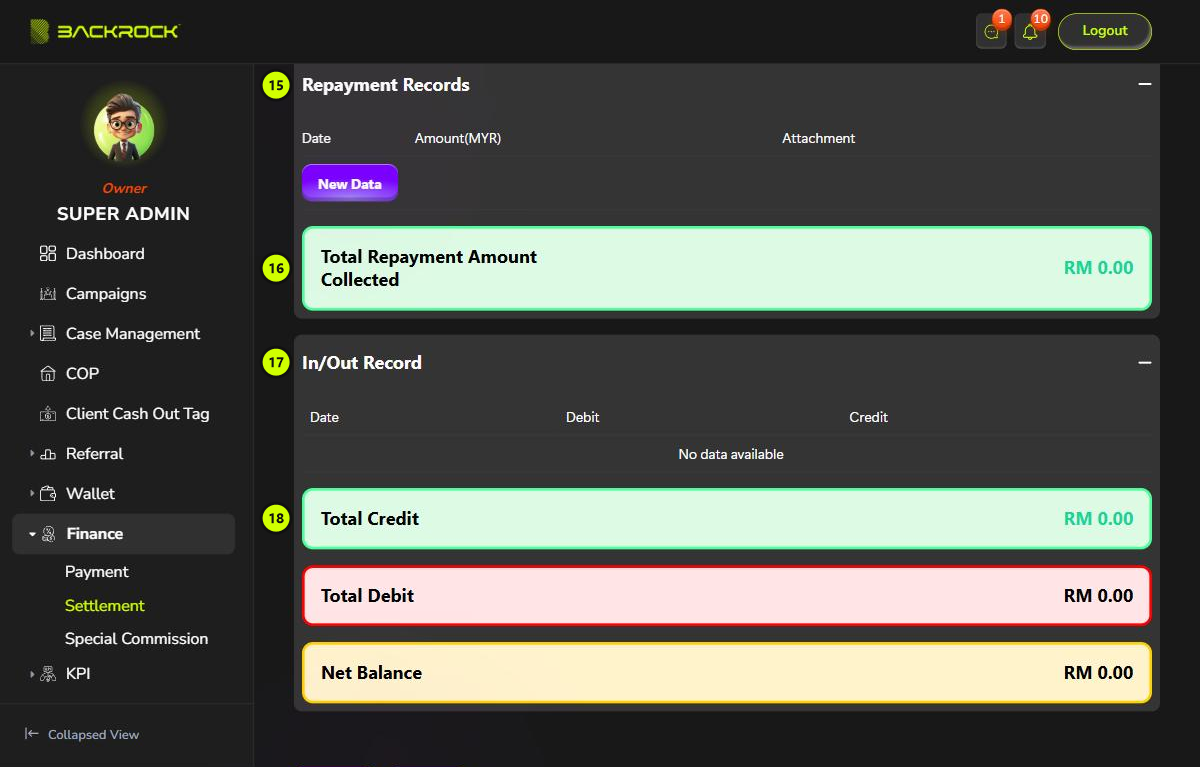
- Repayment Records: the money collected back. Click New Data, then fill in the Date and Amount(MYR), and add a file if needed.
- Total Repayment Amount Collected: the total of the repayment records. It is worked out for you.
- In/Out Record: all disbursements (Debit) and repayments (Credit) together, by date. It is worked out for you.
- Totals: Total Credit (all repayments), Total Debit (all disbursements) and Net Balance (credit minus debit).
- Amounts in Investment Amount, Disbursement Records and Repayment Records can only be whole numbers.
- Remove any empty row before you submit. Every record row needs a Date and an Amount, and every Profit Tenure row needs a tenure.
At the bottom, click Submit. You see Settlement created successfully and return to the Settlement List. Click Cancel to leave without saving.
If a required field is empty, it shows This field is required.
Edit a settlement
Click Edit on a row. The same form opens with the saved details. Change what you need, then click Update. You see Settlement updated successfully and stay on the page.
To remove a saved value, for example Reg No/NRIC, clear the field and click Update.