Bank
The bank list is used wherever a bank is chosen: the loan banks of a case, a customer's bank details, and in the Member Portal. Only Active banks can be chosen.
To open it: in the left menu, click Setting > Bank.
Permissions
Set in Role & Permission:
| Item | Permission |
|---|---|
| Bank menu and list | Banks > View |
| Create Bank | Banks > Create |
| Edit, Disable / Enable | Banks > Edit |
Bank List
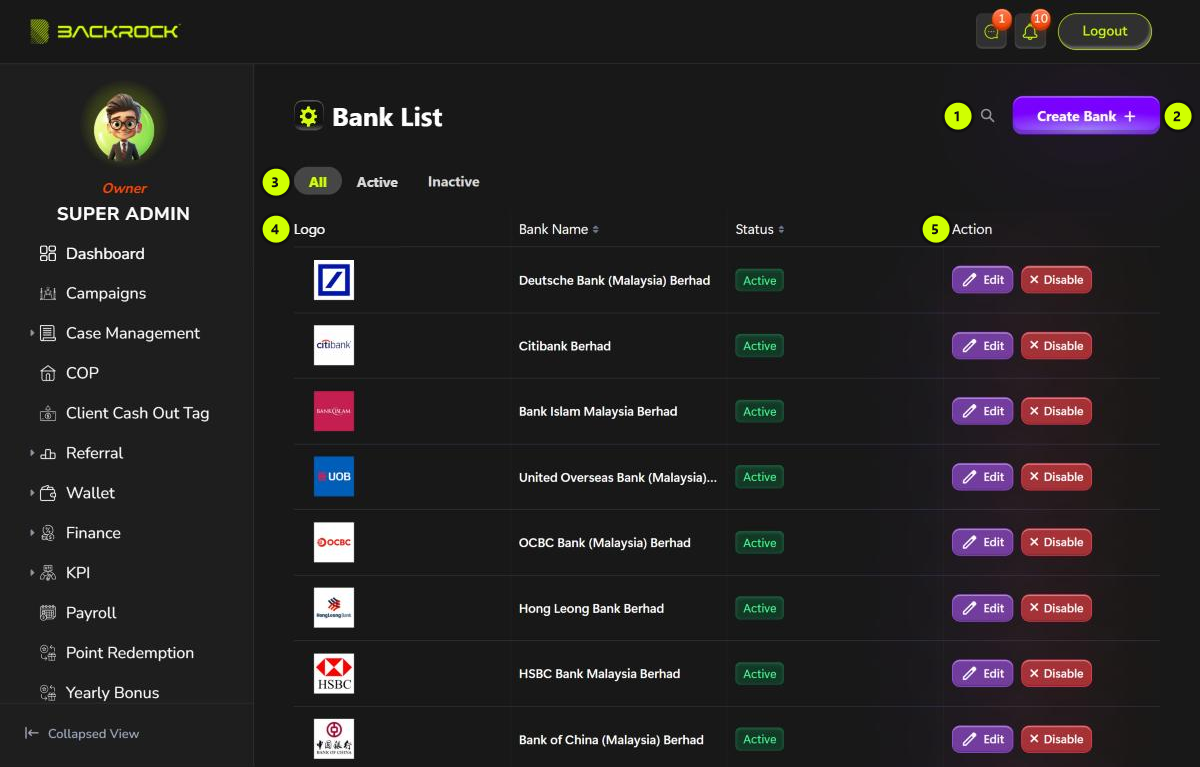
- Search: click the magnifier and type a bank name.
- Create Bank: opens the form to add a bank. You only see it if your role can create banks.
- Status tabs: All, Active or Inactive.
- Bank table: the Logo, Bank Name and Status. Click Bank Name or Status to sort.
- Action: you see these if your role can edit banks.
- Edit: opens the bank to change its name or logo.
- Disable / Enable: click it, then Yes, to change the status. You see Bank updated successfully.
When a bank is disabled, it can no longer be chosen. Cases that already use it keep it, and its name still shows.
A case that uses a disabled bank can't have its banks changed. Enable the bank first, then edit the case.
Create a bank
Click Create Bank.
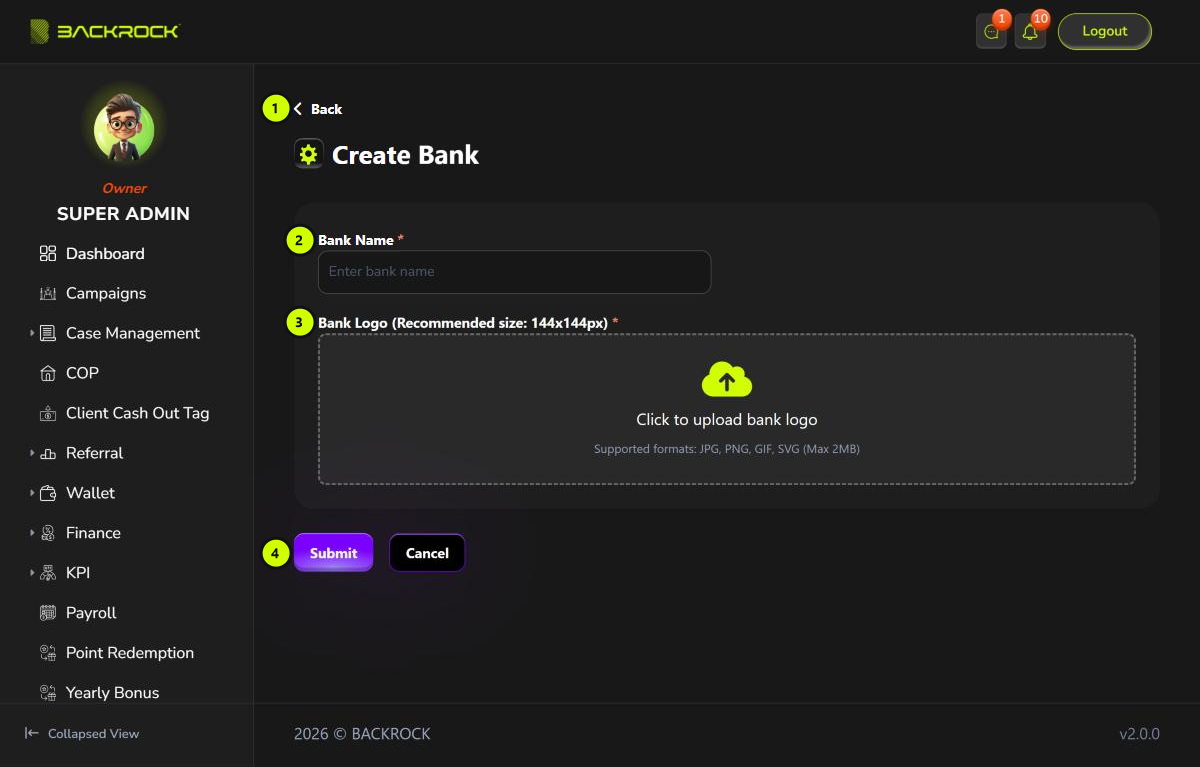
- Back: returns to the list without saving.
- Bank Name (required).
- Bank Logo (required): click the box and choose a JPG or PNG file of up to 2MB. The best size is 144×144 pixels.
- Submit: saves the bank. You see Bank created successfully and return to the list. Click Cancel to leave without saving.
A new bank is Active. There is no way to delete a bank; disable it instead.
If you choose a file that is not a JPG or PNG, or is bigger than 2MB, it is not added and no message is shown. Check the preview before you click Submit.
Edit a bank
Click Edit on a row, change the name or logo, then click Update. You see Bank updated successfully.