Status Configuration
A case goes through a fixed series of statuses, from Opened Cases to Completed Cases (see Case Details). On this page you set, for each status, its colour and what it requires before the case can move on.
To open it: in the left menu, click Setting > Status Configuration.
Permissions
Set in Role & Permission:
| Item | Permission |
|---|---|
| Status Configuration menu and list | Status Configurations > View |
| Edit | Status Configurations > Edit |
Status list
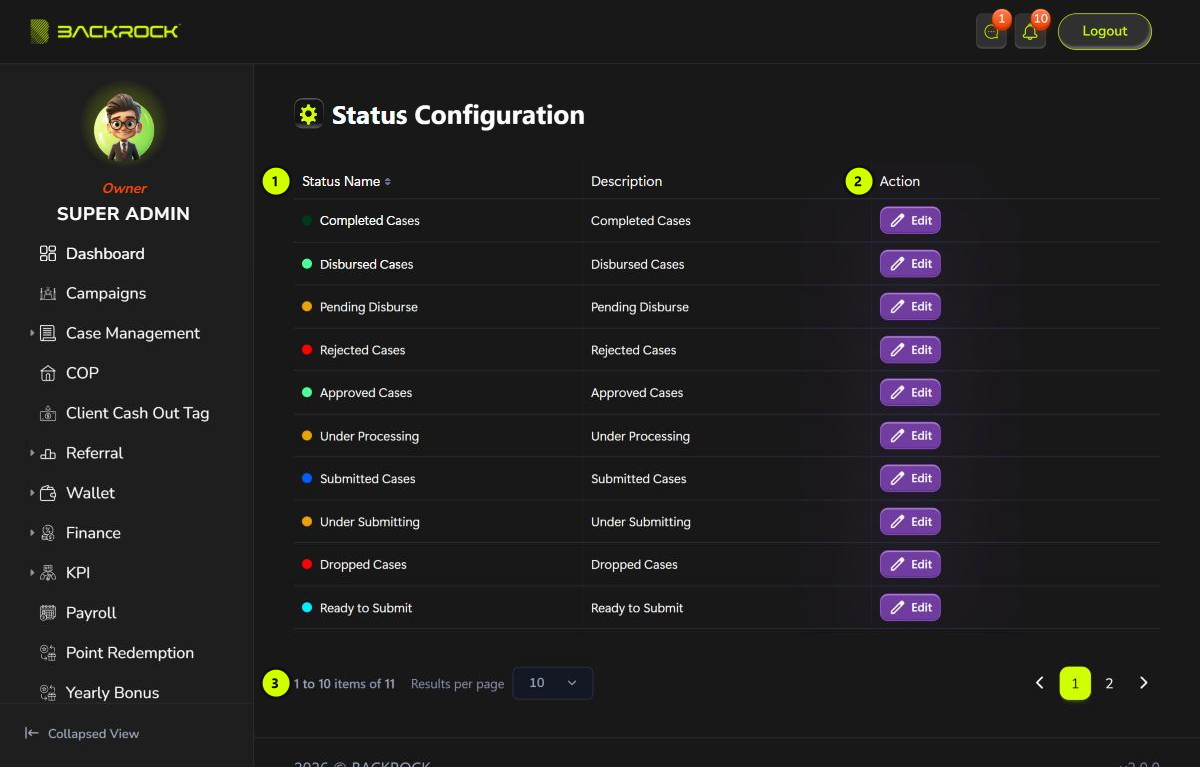
- Status table: each status with its colour and Description. Click Status Name to sort.
- Edit: opens the status to change it. You need permission to edit status configurations.
- Pages: use Results per page and the page numbers to move between pages.
Statuses can't be added, deleted or reordered here.
Edit a status
Click Edit on a row.
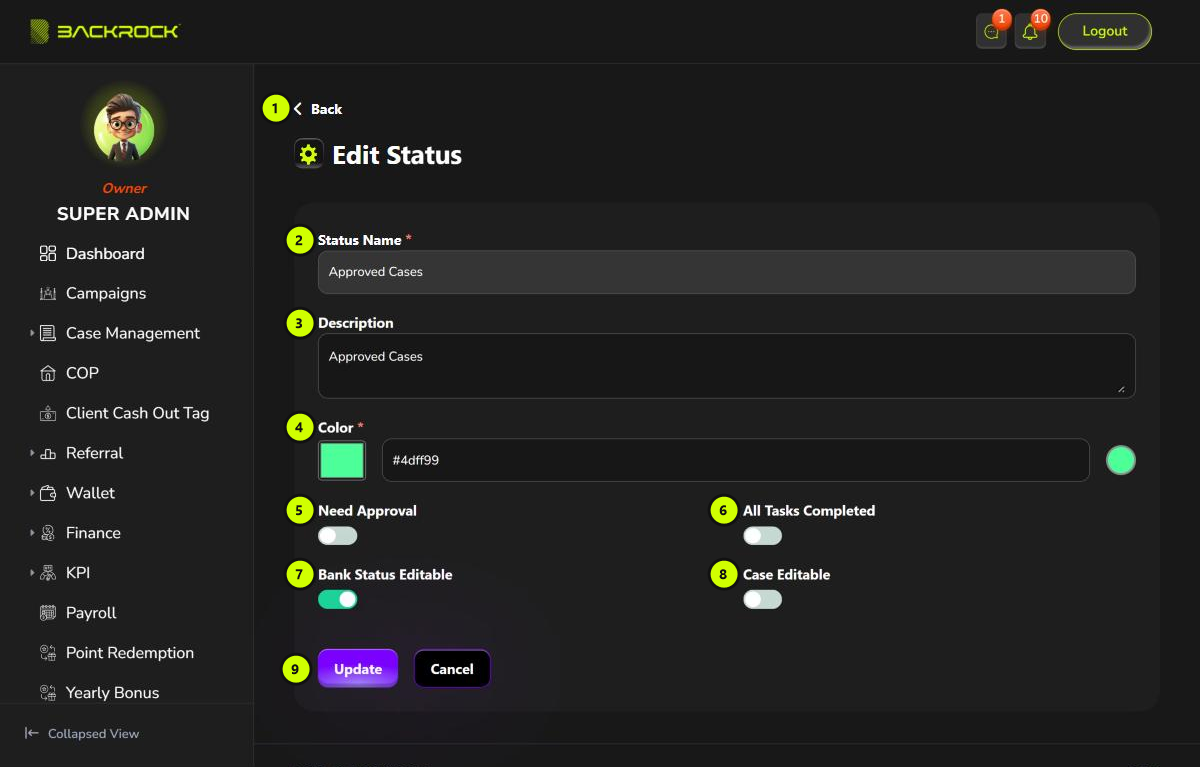
- Back: returns to the list without saving.
- Status Name: can't be changed. Some statuses, such as Completed Cases, Dropped Cases and Rejected Cases, are used by company goals, campaigns and KPI.
- Description (required).
- Color (required): click the colour box to pick a colour, or type a code such as
#4dff99. - Need Approval: the case waits at this status until someone who can approve case statuses approves it. See Pending Approval Cases.
- All Tasks Completed: the case waits at this status until all its tasks are ticked off. See Task.
- Bank Status Editable: the bank statuses of the case can be changed while it is at this status.
- Case Editable: the case details can be edited while it is at this status.
- Update: saves the changes. You see Status updated successfully. Click Cancel to return to the list without saving.
caution
Each case keeps a copy of these settings when it is created. A change only applies to cases created after the change, except the Color, which changes on every case straight away.