Create, View and Edit a User
To open it:
- To add a user, click Create User on the User List.
- To check a user, click View on their row.
- To change a user, click Edit on their row, or Edit on their details.
Permissions
Set in Role & Permission:
| Item | Permission |
|---|---|
| Create User (Submit) | Users > Create |
| User Details (View) | Users > View |
| Edit User (Update) | Users > Edit |
| Department list | Departments > View |
| Upline list | Users > View (Users > View all to list users of other departments) |
Without Departments > View, the Department list is empty, so you can't create or update a user.
Create a user
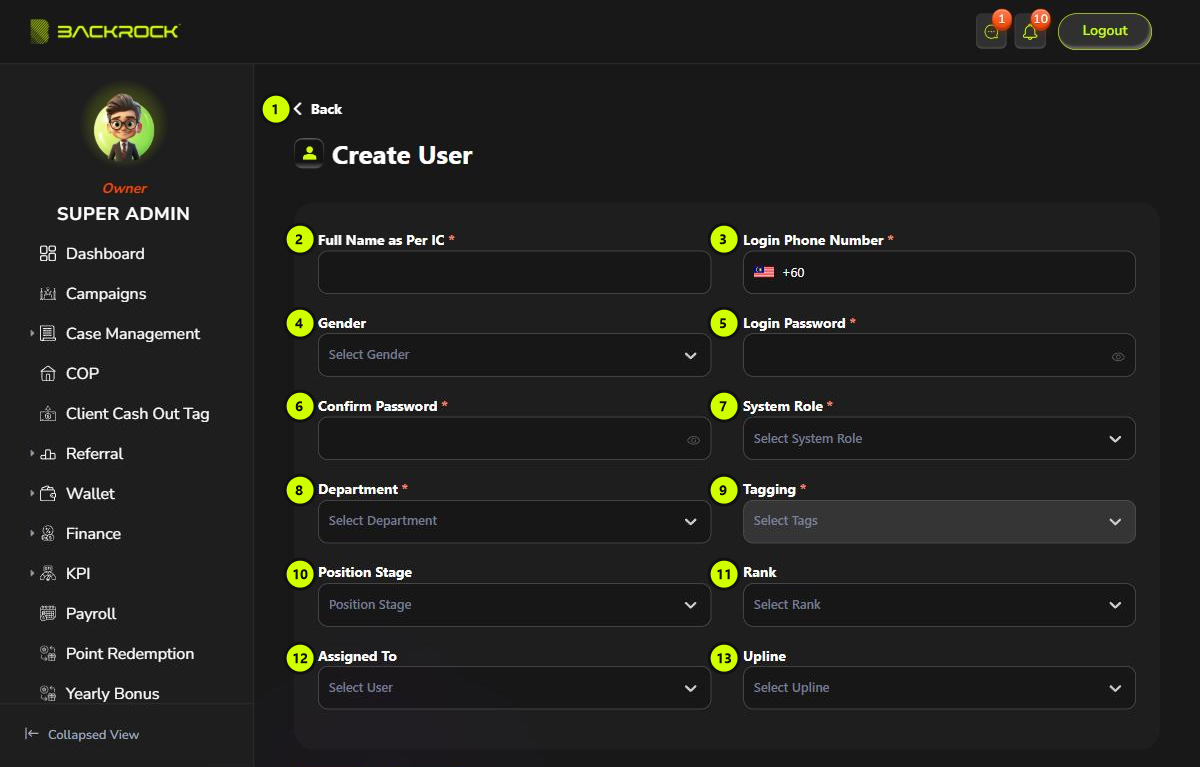
- Back: returns to the User List without saving.
- Full Name as Per IC (required).
- Login Phone Number (required): the number the user logs in with. The country code is +60. Each phone number can only be used once.
- Gender (required): Male or Female.
- Login Password (required): at least 6 characters. Click the eye to show or hide it.
- Confirm Password (required): type the password again.
- System Role (required): decides what the user can see and do in the Admin Portal. The built-in Default and Super Admin roles are not listed and can't be given here.
- Department (required): the user's department. If you change it, Tagging and Assigned To are cleared.
- Tagging (required): the user's position. Choose the department first; only the positions of that kind of department are listed. Some positions can only be given to a set number of users.
- Position Stage (required): Probation, Confirmation or Lead. A user on Probation has a probation end date 3 months after it is set, and a reminder is sent 7 days before it ends.
- Rank (required): Owner, Lead, Senior Executive or Executive. It sets the badge shown for the user and whether they get the rank part of the Yearly Bonus.
- Assigned To (optional): the user's leader. Choose the department first; only users in that department are listed. When you edit a user, the user themselves is not listed.
- Upline (optional): the person who referred the user. It builds the team hierarchy, and the upline earns part of the commission on the user's cases. If you leave it empty, the user is placed under the company's main account. When you edit a user, the user themselves is not listed.
Below the form:
- Click Submit to add the user. You see User created successfully and return to the User List. The new user is Active and can log in straight away with the phone number and password. Give them the password yourself; no message is sent to them.
- Click Cancel to leave without saving.
If a required field is empty, it shows This field is required. Other messages you may see:
| Message | What to do |
|---|---|
| Password must be at least 6 characters | Use a longer password |
| Passwords do not match | Type the same password in both boxes |
| Phone number already exists | The number is already used by another user |
| Tag "…" has reached its limit of … users | Choose another Tagging, or change an existing user's tagging first |
User details
Click View on a row to open User Details. Everything is read only.
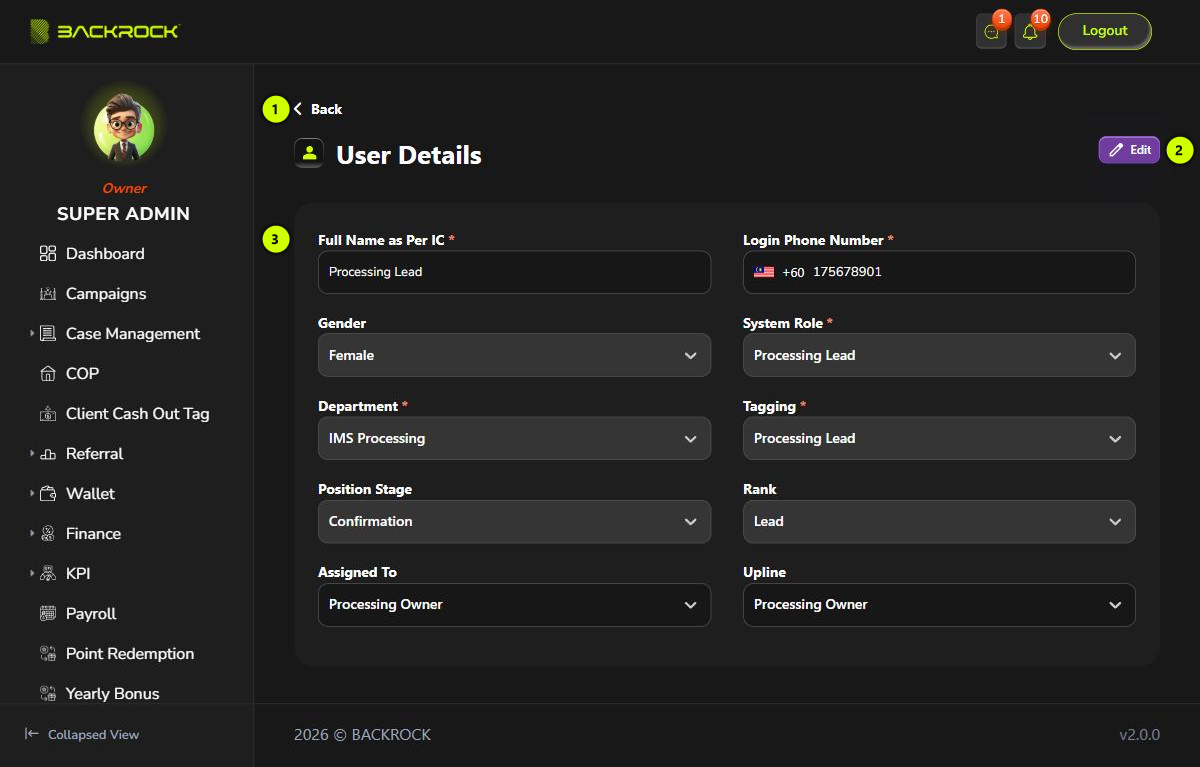
- Back: returns to the User List.
- Edit: opens the form to change the user. You only see it if your role can edit users.
- Details: the same fields as the form, without the password.
Edit a user
The Edit User form has the same fields as Create User, without the password fields.
- Change the fields you need.
- Click Update. You see User updated successfully and stay on the form.
Click Cancel to return to the User List without saving.
What a change does:
- System Role: the user's access changes straight away.
- Login Phone Number: the user logs in with the new number from then on.
- Department and Assigned To: apply to the cases created after the change. Cases the user already has are not changed.
- Upline: the team hierarchy changes straight away. Commissions that were already worked out are not changed.
caution
- Changing Position Stage to Probation starts a new 3-month probation from today. Saving other changes doesn't change the probation end date.
The user's password can't be changed here. To disable or enable a user, use the Disable / Enable button on the User List.