User List
The User List holds the accounts of everyone who uses the Admin Portal: staff and agents. From here you add a new user, check or change a user's details, and disable a user who should no longer log in.
To open it: in the left menu, click User Management.
You see the users of your own department. If your role can view all users, you see everyone.
Permissions
Set in Role & Permission:
| Item | Permission |
|---|---|
| User Management menu, list and View | Users > View |
| Users of every department, not only yours | Users > View all |
| Create User | Users > Create |
| Edit, Disable / Enable | Users > Edit |
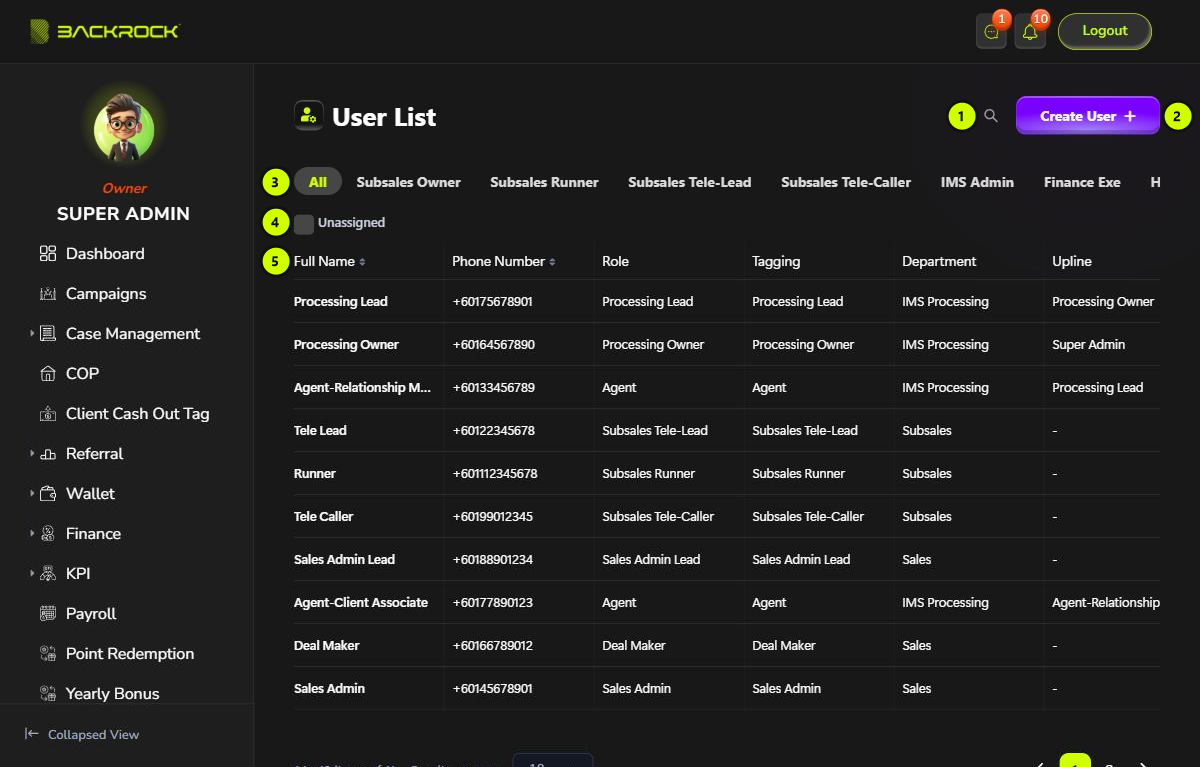
1. Search
Click the magnifier and type a name or phone number. The list updates as you type.
2. Create User
Opens the form to add a user. See Create, view and edit a user. You need permission to create users.
3. Tagging tabs
Each tab is a Tagging, the user's position, for example Subsales Owner, Processing Lead or Deal Maker. Click a tab to show only the users with that position, or All to show everyone. There are more tabs than fit on the page; scroll the tab bar to see them.
4. Unassigned
Tick Unassigned to show only the users who have no System Role yet, for example agents who registered by themselves. When there are any, the number next to it shows how many. Give them a System Role with Edit so they can use the Admin Portal.
5. User table
The newest users are shown first. Click Full Name, Phone Number or Created At to sort.
| Column | What it shows |
|---|---|
| Full Name | The user's name |
| Phone Number | The phone number they log in with |
| Role | Their System Role, which decides what they can see and do |
| Tagging | Their position |
| Department | Their department |
Upline, status and actions
The table is wider than the page. Scroll it to the right to see the rest.
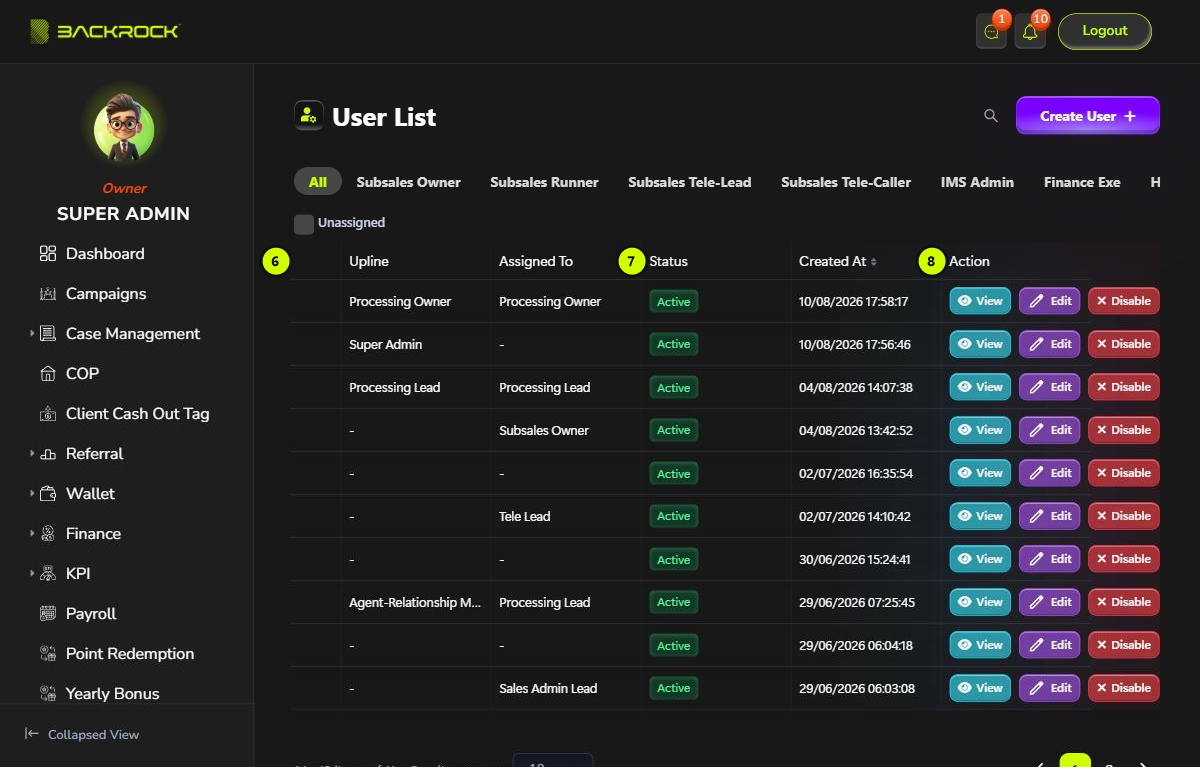
6. Upline and Assigned To
- Upline: the person who referred the user. It builds the team hierarchy, and the upline earns part of the commission on the user's cases. See Team Hierarchy.
- Assigned To: the user's leader in their department.
Each shows - if it is empty.
7. Status and Created At
Active users can log in. Inactive users can't. Created At is when the account was added.
8. Action
| Button | What it does | You need permission to |
|---|---|---|
| View | Opens the user's details | View users |
| Edit | Opens the form to change the user's details | Edit users |
| Disable / Enable | Changes the user's status | Edit users |
Disable or enable a user
- Click Disable (for an active user) or Enable (for an inactive user).
- Click Yes to confirm.
When a user is disabled:
- They are logged out straight away and can't log in again.
- They can't be chosen for new cases.
- They are left out of new payroll and the yearly bonus.
- Their downline and the cases they already have are not changed.
Click Enable to let them log in again.
Pages
Use Results per page and the page numbers at the bottom to move between pages.